Provided by Helena, Music Therapist
All the instruments listed here can be made with household items and can be personalized by the child, so they feel special to them.
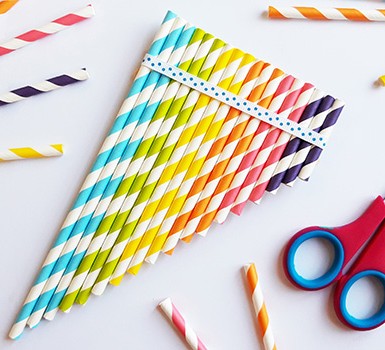
Straw Pan Flute:
Items: Straws, tape, and scissors
To make this instrument you only need a few things. You will start by cutting the straws, leave one straw at its longest length, then slowly cut them shorter and shorter by the same measurement. You can make the pan flute with as many or as little straw as you desire. Once you have all the straws cut, they need to be tapes together in a straight line. The easiest way to do this is line them up on the table with the tops lined up and then lay tape over all the straws. From there you can pick them up and tape the back as well. Tada! A pan flute, now we just need to learn how to use it.
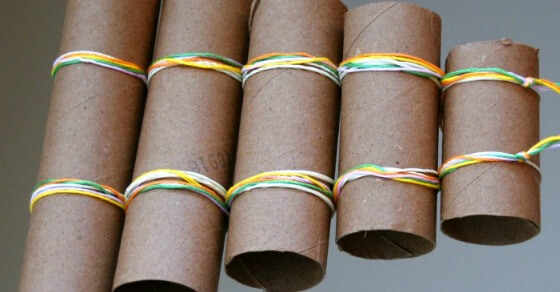
Paper Roll Xylophone:
Items: Paper Rolls (Toilet paper, paper towel, or wrapping paper rolls), rubber bands, string or ribbon (decorations), and pencils or twigs
To make this instrument you will need at least five paper rolls. Start out by cutting the paper rolls to size, keep the large one as a reference and then cut the next for and inch shorter than the last (5in, 4in, 3in, 2in, 1in). After cutting take the smallest tube and rubber band them together on both sides, then keep adding tubes until all the tubes are attached. Finally, use your string or ribbon to decorate the xylophone and hide the rubber bands. The pencils and twigs are mallets to hit the xylophone, you can color them or find fun pencils that the child likes.
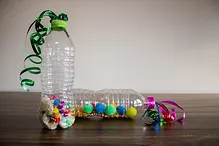
Sensory bottle/music shakers:
Items: Clean plastic bottle with lid, colored pom-poms, rice, colored ribbon, and a screwdriver.
To make this instrument first put the colored pom-poms into the bottle, make this a learning opportunity. Ask you child to put certain colors of pom-poms in, how many of each color should go in, what is their favorite color? After the pom-poms are in next you must add the rice, help them figure out the best way to get the rice in the bottle. (Funnel, spoon, rolled up piece of paper). Next is putting a hole in the lid, this needs to be done by the guardian, so that the ribbon can be put through it. Once the hole is prepared, cut the ribbon to length and tie them in a knot on the inside of the lid, this way the strings will be free outside of the bottle. Finally, reattach the lid to the bottle and have fun looking and listening to your shaker.
Coffee Can Drums:
Items: Coffee can, balloons, scissors, and tape (duct or packing works best)
To make this instrument first you will need to cut the nozzle (The part used to blow up the balloon) off and stretch it around the opening of the coffee can. If you want to make them last longer you can put two balloons over the top of the coffee can. Next you need to tap the balloon down to the can, this makes sure they do not fly off. That is, it a coffee can drum!

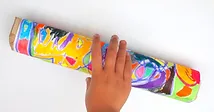
Rainmaker:
Items: Cardboard tube (Paper towel roll), beans or rice, duct tape, and something to decorate it (markers, color pencils, crayons)
The first step for this project is to cover one end of the tube in tape. Make sure there are no hole so that the beans or rice stay inside the tube. Next you will need to and your filler. Fill the tube to a 1/3 or ½ of the way full. After that you will need to tape the open end of the tube, making sure it is completely covered. Next is the fun part, decorating! Once it is complete you can bring the sound of rain anywhere.